Monday, October 28, 2013

Guerrilla Filming Vs. Studio Filming

In cinematography, there are two types of categories of filming: Studio filming and guerrilla filming. Studio filming is what is most often seen in high production movies such as X-Men. The majority of the footage taken from that movie was done inside a large studio, using sets that were constructed specifically for the scene they were shooting on the day. Below I will show a picture of the set for the bridge in X-Men.
This realistic copy of the Golden Gate was made and placed inside a studio and the surrounding made to look like San Francisco in post production. Studio filming is almost exclusively done by those with a bigger budget and a bigger team.

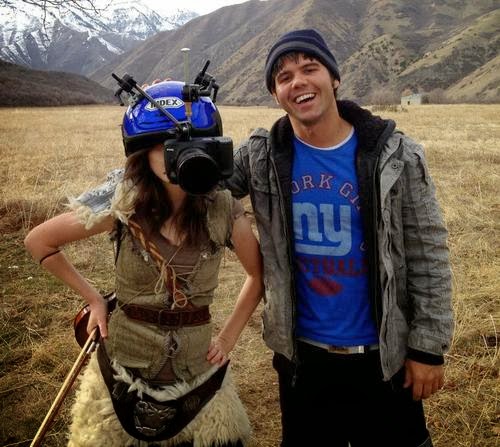
The next type of filming is guerrilla filming. Guerrilla filming is characterized by skeleton crews that use whatever they have available and often on real time locations for short periods of time. This is the type of filming I am accustomed to, because I do not have a real budget. A good example of a cinematographer who often practices guerrilla filming is Devin Graham, a.k.a Devinsupertramp, who is a famous youtuber who filmed a lot of the first videos for musician Lindsey Stirling. Below I will post a picture of Devin Graham. Notice how minimal the gear is compared to the larger studio films, only using a helmet mounted camera, their props, and the location they are in (which they did not rent out).
For the project that I am filming, I will be using a combination of guerrilla and studio, leaning towards studio in that we have an actual set that we visit every time to accomplish all shots, and leaning towards guerrilla in the gear that I use. It's been interesting, since the lighting aspects and such that come along with studio filming have presented themselves to me, making my job a cinematographer much more difficult. All in all, it's a good experience though, and I am beginning to find my way around studio filming.

With that, I bid thee farewell ladies and gentlemen.

Sunday, October 13, 2013

Abandon: A Super Scary Horror Film- Preview

Hey guys! Today, I have a very special post to share with you. As you know if you have read my previous posts, I have been working on a horror short film with a group of other friends. I now have enough of a draft to show you! I recommend you start from 2:25 as that part on is a more revised, better film. We will be retaking the first portion on our next film day.

I was aware I did not need to post today, but I was simply too ecstatic to resist. Tallyho, me hearties!

Monday, October 7, 2013

Cinematic Continuity and Exposure

Today I will be talking about cinematic continuity and exposure, as the title of this post would suggest. As I have said before, there are many things that go into making a film, and you can't expect to make a good film while simply holding a camera in hand. When you have everything placed just so in one shot, it needs to be exactly the same in the next shot. This is called cinematic continuity.

As the cinematographer, you strive to create a visual story so believable that the viewer is sucked into it as if it was real life. Things don't magically move on their own, and if you have a can sitting on a counter in one shot, then magically disappear in the next shot, it will take away from how believable the film is. One instance of this can completely ruin an entire film! So, when you film, you need to always keep track of which props are where, where the actors are standing, what the actors are doing, and the natural light that is on set. If you don't, it will completely ruin the cinematic continuity, turning your amazing story into a substandard film.

You also need to make sure you have the right exposure. Exposure, on a very, very basic level, is the amount of light that is on the scene. As a cinematographer, you use exposure to create ambient effect as well as to make subjects stand out. If you underexpose an object, it will look very saturated and dull, while overexposing an object will make the object look overly bright- highlights will blend in with the rest of the picture. I will post an overexposed picture, an underexposed picture, and a perfect picture below. You should be able to tell the difference between the three.


If you didn't get it simply by looking at the pictures, the top one is overexposed, the middle one is underexposed, and the bottom one is perfectly exposed. Note that underexposure doesn't always look all that bad, personally I think the photographer of the middle picture made it underexposed for dramatic effect. Before I go I'd like to say that I do not own these pictures, but rather took them from google images after searching "Overexposed picture", "Underexposed Picture", and "Perfectly Exposed Picture". With that, I end this post. Farewell mine Lords and Ladies, I bid thee adieu!